When it comes to upgraded LED lighting, there are thousands of options, maybe millions. Since the advent of LED lighting, the influx of manufacturers has been almost overwhelming. How do you know the good from the bad? For the most part, most of the options look similar to one another, so what’s the difference between one that costs $100 and another that’s $500? Or is there really a difference? Simply put, yes, there really is a difference, and we’d like to take some time to explain some of the differences and to help you determine which light is right for your needs. For the purpose of this article, we’ll be specifically discussing a company called Baja Designs who is at the pinnacle of the lighting market, and we’ll explain why throughout this article.
The earliest LED, or Light Emitting Diode, was developed in 1962 as a low output signal for electronic devices, such as remote controls. But LED’s as we know them today have only become available in the last fifteen years or so as a super bright, long range, reliable light source at which point they began to find themselves into the automotive market. Since this point, there have been numerous companies, both those previously involved in some form of lighting manufacturing, as well as newcomers, jumping on the bandwagon to produce automotive LED lighting in some fashion or another. One such company that saw the performance benefits of LED early on is Baja Designs. Baja Designs was founded 25 years ago and was originally most popular for producing motorcycle halogen and HID lighting to be used in offroad terrain as gnarly as the Baja 1000 race. Their experience in offroad racing plays a big part in Baja Designs’ success as it is not only a great proving ground for their products, but lets them discover first hand what works, and honestly, what doesn’t.
What makes a Baja Designs LED Light better than the competition?
Lets break this down by making some comparisons to some of the exclusive technology and components you’ll find as standard equipment on a Baja Designs product:
- uService – Okay, so you went out and bought some LED lights, mounted them, and took them out for a test drive. First scenario is that you discover the spot beam pattern really isn’t what you were after and you would prefer more of a wide angle type of pattern. Second scenario is your buddy kicks up a rock and scratches the lens of your new light. Huh, with nearly all manufacturers, you’re going to either be forced to replace the entire light or send it back to the manufacturer. But, with Baja Designs, all of their LED lighting comes standard with what they call uService. Basically, their lenses can be serviced by the end user with simple hand tools to swap out the lens for either a fresh, scratch free lens, or to change the beam pattern, or heck, even the color of the lens.
- ClearView – When looking at offroad LED lights, you’ll probably notice a lot of terminology floating around spot, long range, wide, fog, and so forth. This terminology is describing the beam pattern, or basically the width and distance of the light. Some manufacturers merely install a clear, flat lens and just let the light essentially flow through. However, depending on what the light is being used for, you can gain a ton of visibility by selecting the right beam pattern for the task at hand. Baja Designs has identified the traditional, as well as non-traditional, lighting zones better than anyone in the industry, to even include dust/fog and wide cornering to ensure you can basically see as good at night as you could during the day, no matter the terrain or the speed.
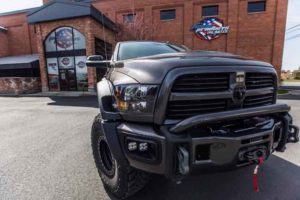
Baja Designs Fog Pocket Mounting Kit – You want BRIGHT? How about four, count ’em FOUR Squadrons in the front bumper. This particular truck, Sledge, has them mounted in an AEV Front Bumper. - MoistureBlock – We’ve all seen moisture built up in a headlight or other light housing. Moisture not only skews the lighting beam pattern, but will also spell the demise of the light’s life expectancy. Most manufacturers seal their lenses to the housing using silicone. In contrary, Baja Designs makes their lenses serviceable (uService), and feature an integrated o-ring that builds a waterproof connection between the lens and housing, ensuring there is no leakage, even when completely submerged in water. And to take this a step further, Baja Designs’ cords feature a patented MoistureBlock device that is an end-all for any moisture that may have wicked its way into the cord, as again, if moisture even has a chance of seeping up the cord, its game over for the light. With MoistureBlock, you’ll have no worries whatsoever, even if you cut the cord in half.
- CopperDrive – Many of the LED lights you’ll find on the market, especially the “value priced” options, run a circuit board made of aluminum. Sure, these aluminum circuit boards turn the lights on and off, and get the job done, but not efficiently. In general, aluminum is terrible at conducting and maintaining heat, thus the temperature can fluctuate wildly. Copper, on the other hand, has the ability to not only maintain temperature, but at a higher degree. So guess what Baja Designs uses? Copper! And why doesn’t the majority of the competition use copper? Its more expensive than aluminum as a raw product, that’s why. With Baja Designs’ CopperDrive technology, you can safely run their lighting at 100% for hours, if not days, on end, and still maintain a consistent light intensity throughout.
- 5000k – Kelvin, who’s Kelvin? Kelvin is a measurement of thermodynamic temperature, but in lighting terms, its typically referring to the color of the light. Basically, the higher the number, the more blue the light is, and the lower the number, the more orange. Nearly everyone has agreed that somewhere around 5000 Kelvin is as close to the color of natural daylight as you can get. We’re not talking about a rainy afternoon in March, we’re talking a hot summer day at noon without a cloud in the sky. And its been determined that this is the time when a pair of human eyes can see the absolute best. And can you guess at what Kelvin Baja Designs produces all of their lighting? You guessed it…..5000k. This makes sure that not only can you see better with their lighting at night, but with less fatigue because your eyes aren’t strained.

S2’s make for an awesome backup lamp, whether its in a stock bumper or an aftermarket bumper, such as this.
How to determine which light suits your vehicle and application.
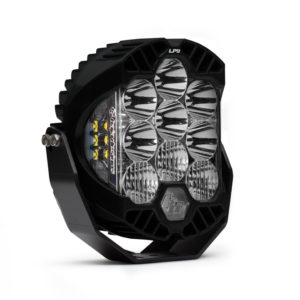
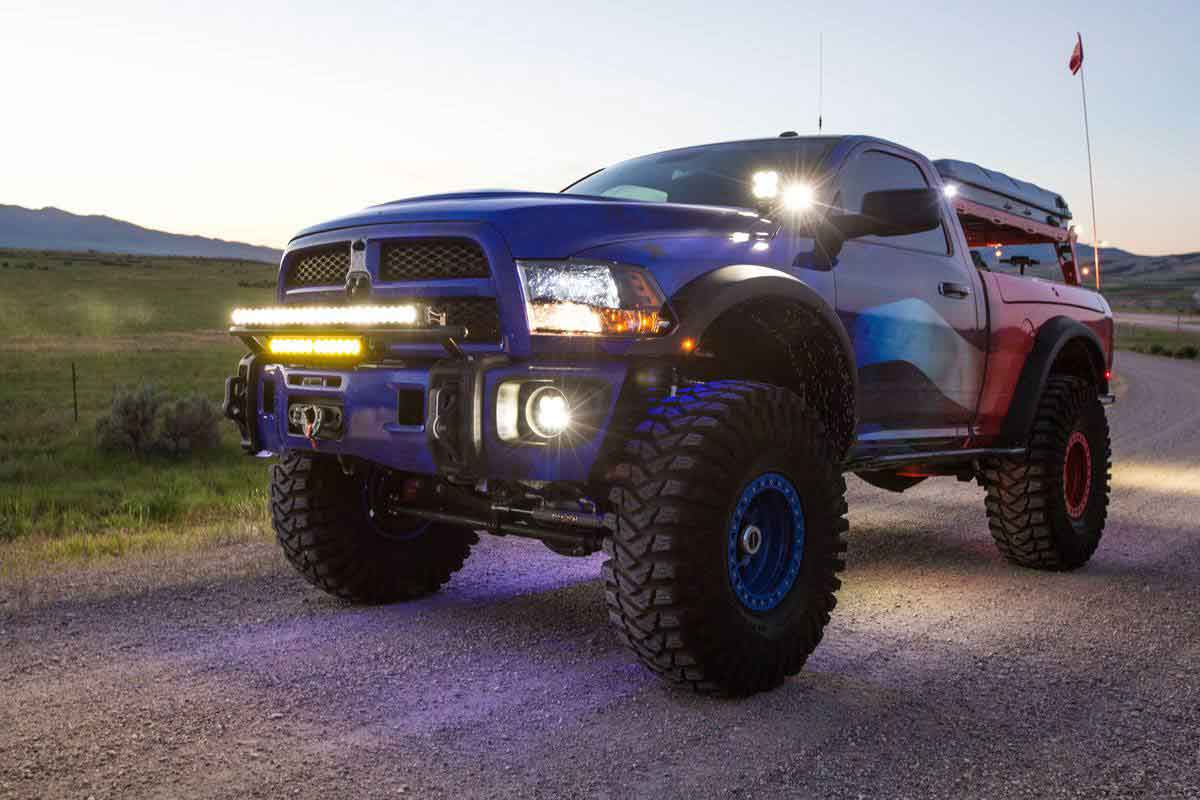
The first question is what you are wanting the light for and where you’re planning to mount it. Most people’s primary intention of upgrading with an offroad LED light is further forward light projection compared to the stock headlights, typically for offroad use. With this case in mind, where do you plan on mounting the light(s)? For those looking to do a rooftop mount above the windshield, that’s simple, you’ll want either an OnX6 or S8 50” light bar typically to span the width of the roofline. However, probably the most popular option is to mount something either in an existing bumper opening, or right on top of the bumper. In our opinion, the cleanest installation will come from a kit that mounts in the stock fog light holes, and Baja Designs offers vehicle specific bracket and light kits designed to accomplish this that will typically utilize a pair of their Squadron-R (round) LED lights for a super clean installation and appearance. Similar to this option are mounting kits that will utilize either a 20” or 30” OnX6 or S8 in the center bumper opening. For some big light output in a really cool, unique looking light that can easily be mounted to a grill guard or on top of the bumper, you need to check out Baja Designs’ LP9, cranking out over 11,000 lumens utilizing 9 LED’s. And finally, another option that has recently become popular, and honestly stolen from the Jeep crowd, are a-pillar light mounts. Truthfully, unlike the Jeeps that really do mount to the pillars on each side of the windshield, the mounting kits for trucks mount to the hood hinge, but definitely give the appearance of being mounted in a similar fashion as Jeeps have been doing for years. In our experience, if you’re wanting a really quality light for use on some backroads and offroading, a pair of Squadron lights will deliver exactly what you’re after.
Have you ever tried to hook up to a trailer in the dark? Of course you have, and it sucks! The factory backup lights on any truck are sub-par at best. They’re really only there to notify others that you’re backing up, not to actually aid in seeing anything (at least that’s our opinion). One of our most popular methods for upgrading reverse lighting is with a pair of flush mount S2’s into the stock rear bumper. The flush mount design delivers a really clean, seam-free appearance, and surprising to some, even though the S2 only has two LED’s, is actually really bright. With this type of installation, you can choose to have the lights turn on automatically when you put the vehicle in reverse, or run a switch to turn them on at anytime. We’ve found that by wiring in a relay, you can have both options. By having the ability to flip the lights on manually is really helpful for nighttime loading or just a general scene light at camp, for instance. And for those that have ample room to spare and want a TON of light, the Squadron flush mount is another great option.
Lastly, lets talk about some non-traditional uses we’ve found really handy for auxiliary lighting.
We tend to use our trucks for a lot of things, nearly live out of the darned things. This means we’re in and around the trucks and in the bed both during daylight hours, as well as night. Having the ability to light up the bed with a real light, not the useless cargo light, as well as surrounding areas around the trucks is awesome, and once you’ve had it, you’ll wonder how you lived without. The most effective way to light the bed and behind is to get it up nice and high, such as mounting off of a headache rack, chase rack, or in the cab protector of a flatbed. As with the backup lighting dilemma, we’ve found that the S2 are really versatile and can deliver a nice array of light for nearly any purpose, whether you’re loading a dirt bike in the dark or setting up camp.
Does any of this sound scary? We’ve heard concerns over the fact that the majority of these lighting upgrades are relatively universal, meaning you’ll need to turn on your creative side to determine how you’re going to mount your new awesome lights, and then how you’ll wire it. Well, we’re here to tell you its not scary…really! From a mounting standpoint, you’ve got a few options. If using one of the vehicle specific bracket kits, the installation will be a no-brainer as they are designed to work with stock mounting holes and give you all of the hardware you’ll need. Conversely, if you’re just getting a pair of Squadrons, for instance, the included bracket will have a u-bracket that you’ll need to affix to your mounting surface with a single bolt. Yes, you’ll probably need to drill a hole, but its easy, we promise. Probably the scariest installation is when installing flush mounts as it does require you to cut a square hole. The best advice you’ll get: measure three times, cut once! For this procedure, create a template of the hole you’re needing to cut and tape it to your surface. From there, drill one hole in each corner and basically connect the dots with a cut off wheel, jig-saw, or your weapon of choice. The electrical installation is also a snap. You’ve got two wires: a ground and a hot. You’ll probably end up running both to the battery, or if you want to get really cool kid points, you’ll use a switching system, such as a Switch-Pros or Trigger to control all of your 12 volt accessories.
Overall, we hope that we’ve cleared the air on some common misconceptions around upgraded LED lighting and shed some light on what makes a good light better than a not so good light. As always, if you have any questions, do not hesitate to give us a call at 888-993-4373 or shoot an e-mail to [email protected].



I like to upgrade all of my lights and signals on my2008 dodge ram diesel 3500 how much is the cost and witch led lights should I buy